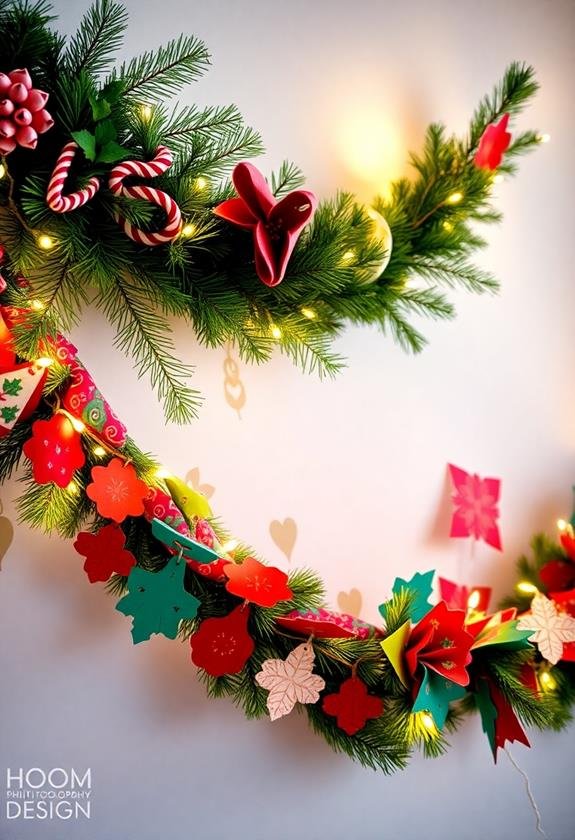
To create an easy Christmas garland using paper and fabric, gather your materials, such as twine or wire, a hot glue gun, and an array of colorful paper and fabric. Start by cutting paper into uniform shapes and fabric into strips about 1-2 inches wide and 12-18 inches long. Securely tie or glue the fabric onto the base, spacing them evenly. Add embellishments like ribbons, dried fruits, or twinkling lights for added charm and dimension. Consider your color palette and theme to guarantee a cohesive look. This dynamic project can showcase your creativity and festive spirit, and you'll discover even more ideas for customization along the way.
Materials Needed
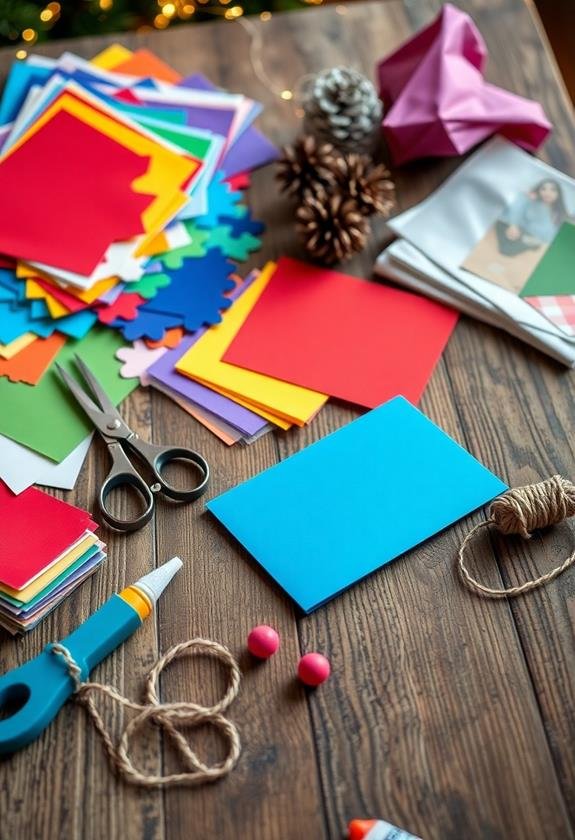
Gathering the right materials is essential for creating your easy Christmas garland. Start with a sturdy base; you'll need a length of twine, wire, or a pre-made garland frame as your foundation. Next, gather your decorative elements. Paper and fabric are excellent choices for adding charm and color. You'll want to select a variety of paper or fabric in different textures, such as felt, cotton, or even glitter paper. This diversity will enhance the visual appeal of your garland.
Additionally, consider including embellishments like ribbons, beads, or dried fruits for added interest. Scissors and a hot glue gun are vital tools that'll help you cut and secure your materials together effectively. Don't forget to grab some floral wire or string for attaching your decorations to the base, ensuring everything stays in place.
Lastly, prepare a clean workspace to organize your materials. Having everything at hand will streamline your crafting process and keep you focused. With these materials assembled, you're ready to plunge into the fun and creative process of constructing your festive garland, adding a personal touch to your holiday decor.
Choosing Your Colors
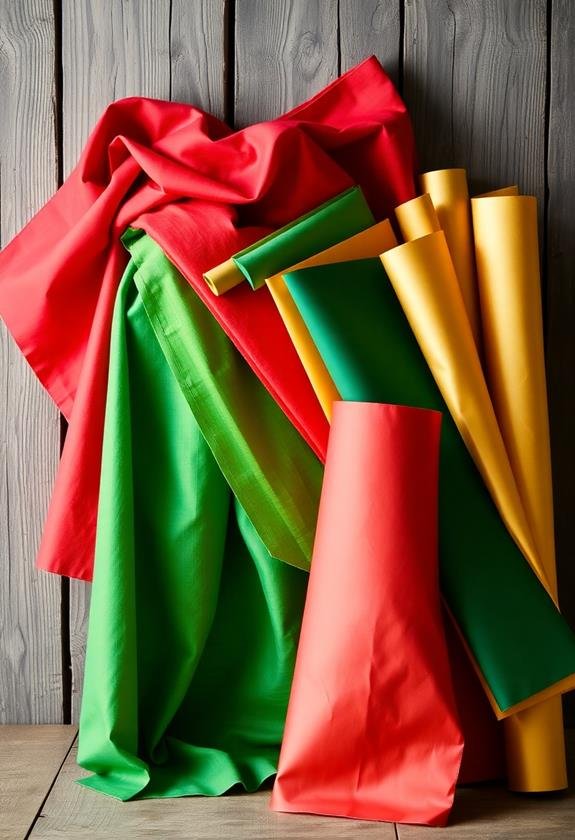
Now that you have your materials ready, it's time to think about the colors for your Christmas garland. Choosing the right color scheme can elevate your decoration and set the mood for your holiday festivities. Start by considering traditional colors like red, green, and gold, which evoke a classic Christmas feel. However, don't be afraid to experiment with non-traditional colors, such as blues, silvers, or even pastels, to create a unique look that reflects your style.
You might also want to think about the overall aesthetic of your space. If your home features a modern design, a monochromatic palette with shades of white or gray can create a chic, elegant garland. On the other hand, if you're aiming for a cozy, rustic vibe, warm earth tones like browns, deep reds, and greens can add a welcoming touch.
To help solidify your color choices, consider creating a small mood board. Collect swatches of fabric or paper in your chosen colors, and lay them out together. This will help you visualize how they complement each other, ensuring your garland becomes a stunning centerpiece of your holiday decor.
Preparing the Paper
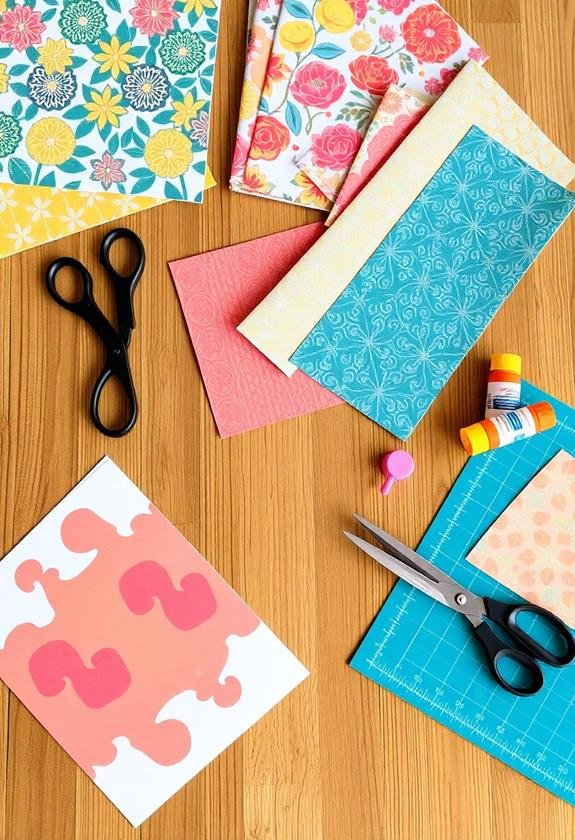
Preparing the paper is an essential step in crafting your Christmas garland. To guarantee your decorations look polished and festive, you'll want to select high-quality paper that complements your chosen colors. Start by gathering all necessary materials, including the paper itself, scissors, a ruler, and a pencil for measurements.
Here's a quick checklist to help you prepare:
- Choose the right type of paper: Consider using cardstock or scrapbook paper for durability.
- Select a variety of patterns: Mixing solid colors with festive designs adds depth to your garland.
- Cut the paper into uniform shapes: Consistent sizes help maintain balance in your garland's appearance.
- Decide on a theme: Whether it's traditional or modern, a cohesive theme will unify your design.
- Prepare a clean workspace: A tidy area allows for better focus and efficiency as you create.
Once you've followed these steps, your paper should be ready for the next phase of your project. Remember, taking the time to prepare properly will pay off, resulting in a beautiful garland that enhances your holiday decor and showcases your creativity.
Cutting Fabric Strips
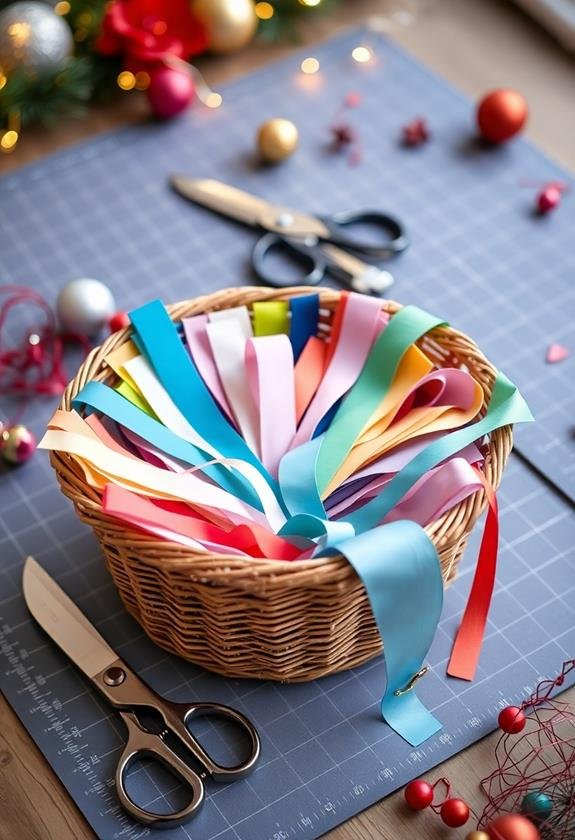
As you immerse yourself in creating your Christmas garland, cutting fabric strips is an essential step that adds texture and warmth to your design. Start by selecting a few festive fabrics that complement your theme, such as plaid, solid colors, or even whimsical prints. Once you've chosen your fabrics, lay them flat on a cutting mat or a clean surface, guaranteeing they're wrinkle-free for the best results.
Using a rotary cutter or sharp scissors, cut your fabric into strips, typically about 1 to 2 inches wide and 12 to 18 inches long. This size works well for tying and layering, giving your garland a fuller appearance. Remember to measure and mark your cuts with a ruler and fabric chalk for precision, which will make your strips uniform—important for a polished look.
As you cut, keep an eye on the patterns and colors to create an appealing visual mix. You might find it helpful to cut several strips of each fabric to guarantee you have enough variety. Once you've completed your cutting, you'll be ready to move on to the next delightful step of assembling your garland, where your hard work will truly shine.
Assembling the Garland
With your fabric strips ready, it's time to bring your Christmas garland to life. Start by laying out your fabric pieces in a pattern that appeals to you. This is where you can get creative; mixing colors, textures, and lengths can add depth to your garland.
Next, you'll want to secure your fabric strips onto the twine or string. You can do this by tying them in knots, creating loops, or using a simple slipknot technique. Make sure to space them evenly, maintaining a balanced look throughout the length of the garland.
To guarantee your garland turns out beautifully, consider the following tips:
- Choose a variety of fabric colors for visual interest.
- Mix different fabric patterns to create a lively effect.
- Use varying lengths of strips to add dimension.
- Keep a consistent distance between each strip for uniformity.
- Tie securely to prevent any strips from slipping off.
Once you've secured all your fabric strips, step back and admire your handiwork. Your garland is shaping up nicely, and you're just a few steps away from completing this delightful holiday decoration!
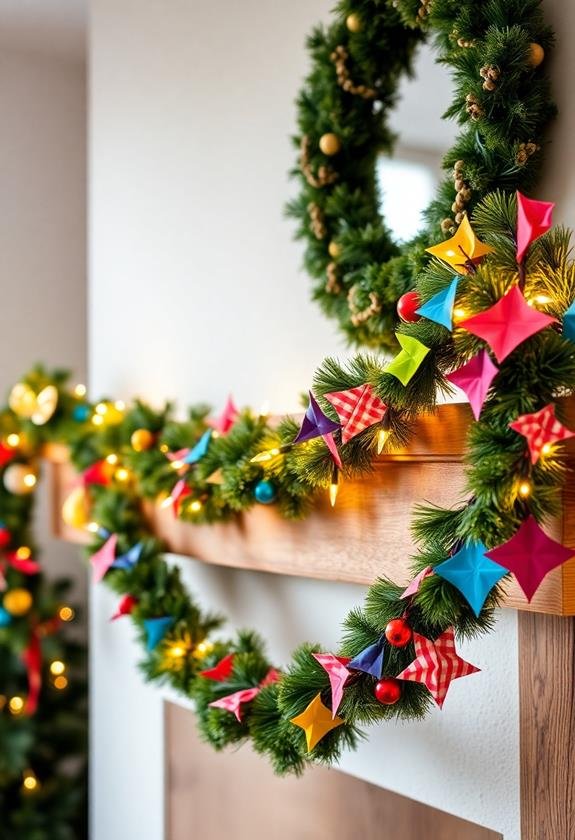
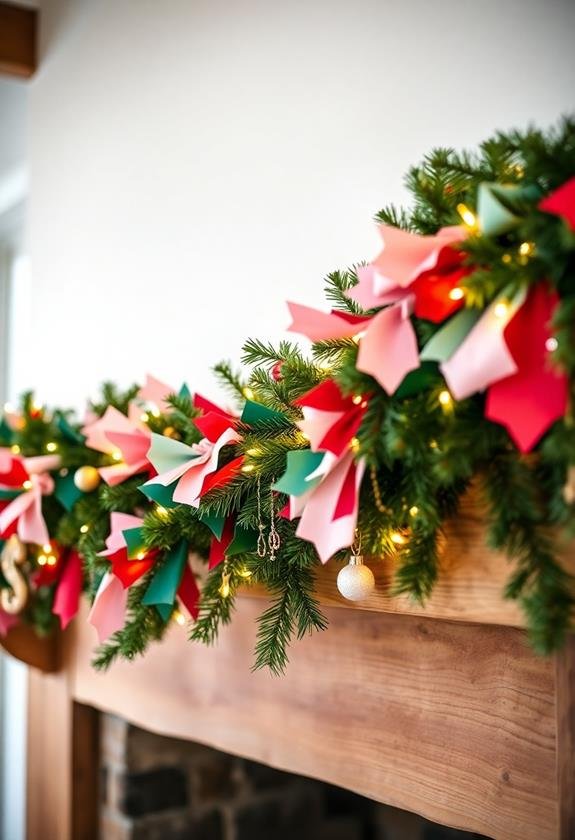
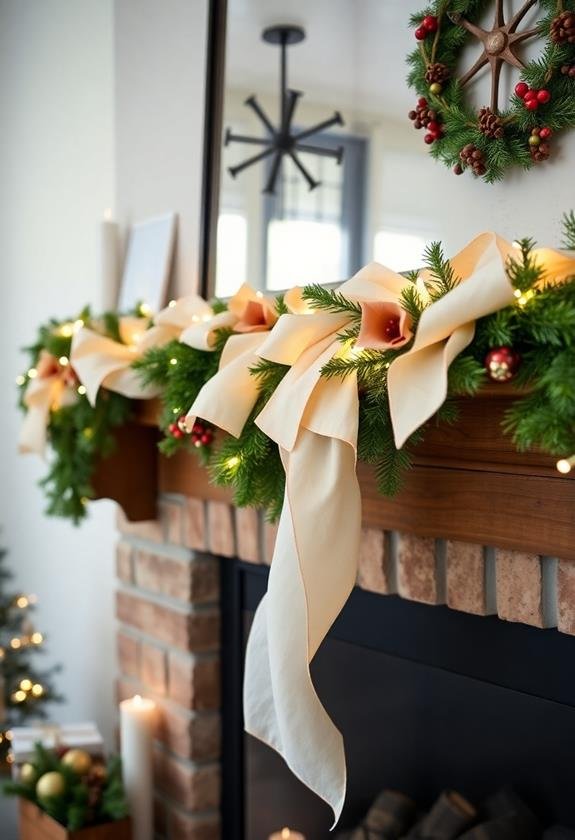
Adding Decorative Elements
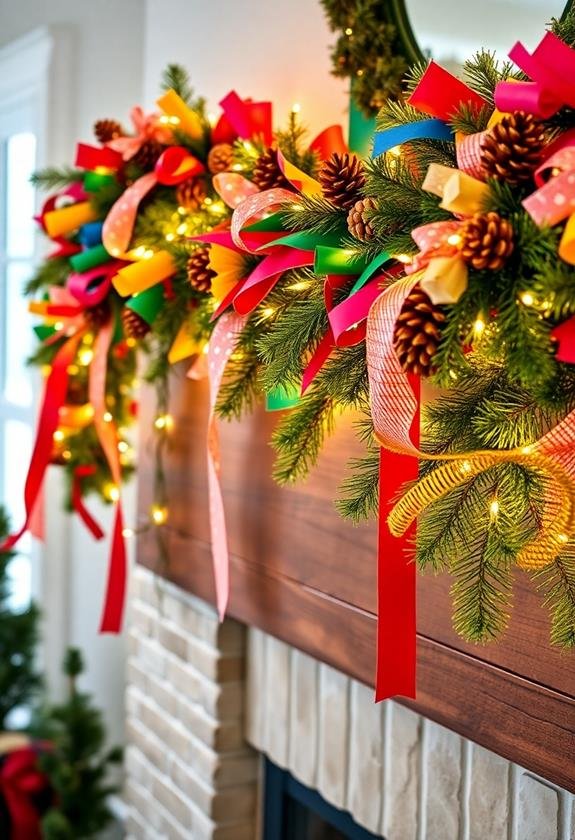
To elevate your Christmas garland, adding decorative elements is essential for that festive flair. Consider incorporating items like pinecones, berries, or even small ornaments to create a visually appealing design. You can glue or wire these elements into the garland, ensuring they're securely attached and evenly spaced for a balanced look. Adding nature-inspired decor can also enhance the holiday theme and bring a cozy feel to your decorations.
Think about using ribbons in various colors and patterns, too. A simple bow can serve as a focal point, while trailing ribbons can add movement and texture. Layering different fabrics can also enhance the overall appearance; try mixing burlap with satin for a rustic yet elegant feel.
Don't forget about lighting! Twinkling fairy lights can bring warmth and charm, especially when wrapped around the garland. You might also want to include natural elements like dried citrus slices or cinnamon sticks, which not only look appealing but also add a delightful aroma.
Lastly, personal touches can make your garland truly unique. Consider adding family photos or handmade ornaments that reflect your holiday traditions. By thoughtfully selecting and arranging these decorative elements, you'll create a Christmas garland that's not only beautiful but also meaningful.
Final Touches
The final touches can truly transform your Christmas garland from lovely to stunning. These finishing details can elevate your creation, ensuring it stands out and brings joy to everyone who sees it. You'll want to make sure you add a few special elements that reflect your personal style and holiday spirit. Here are some ideas to contemplate:
- Sparkly Accents: Incorporate glitter or sequins to catch the light and add a festive sparkle.
- Natural Elements: Use pinecones, dried oranges, or cinnamon sticks for an inviting, rustic touch.
- Ribbon Bows: Tie on some beautiful bows using seasonal fabrics for an extra pop of color.
- Personalized Tags: Attach small tags with family member names or holiday messages for a unique, personal flair.
- Scented Sprays: Lightly mist your garland with holiday-scented sprays, like pine or cinnamon, to evoke warm memories.
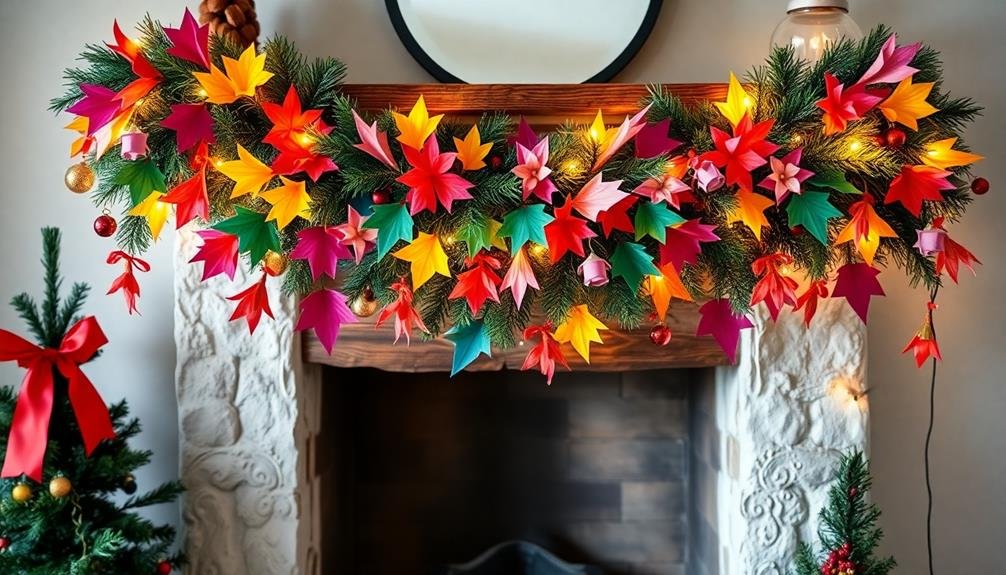
Displaying Your Garland
Once you've added those final touches to your Christmas garland, it's time to showcase your creation. The way you display your garland can elevate your holiday decor and create a warm, festive atmosphere. Start by identifying the perfect location; draping it over a mantelpiece or along a staircase railing creates an inviting focal point. If you have a large window, consider hanging your garland there to let it shine both inside and out.
For a more creative approach, you might use adhesive hooks to hang your garland in a playful, cascading manner from the ceiling or along a wall. This adds depth and dimension to your space, making it visually interesting. Alternatively, you can wrap it around a banister or frame it around a doorway for a charming entryway.
Don't forget lighting! Adding string lights can enhance your garland, making it glow beautifully during the evening. Whether you choose a classic or modern presentation, the key is to let your garland reflect your personal style. With these ideas, you'll create a display that not only showcases your handiwork but also spreads joy throughout your home this holiday season.
Tips for Customization
Customizing your Christmas garland can make it truly unique and reflective of your style. Whether you prefer a traditional look or a more modern aesthetic, there are endless ways to personalize your creation. Start by considering the colors and themes that resonate with you. You can mix different fabrics and papers to achieve the desired look.
Here are some tips for customization:
- Choose a color palette: Select colors that match your home decor or holiday theme to create a cohesive look.
- Incorporate personal elements: Add family photos or mementos to make the garland more meaningful.
- Experiment with shapes: Use various shapes for your paper and fabric cutouts, such as stars, hearts, or even your initials, to add flair.
- Texture variety: Mix different materials, like felt, burlap, or metallic paper, to create an interesting texture that catches the eye.
- Seasonal embellishments: Attach items like pinecones, berries, or ornaments that complement your garland and enhance its festive appeal.
Frequently Asked Questions
How Long Does It Take to Make the Garland?
Making the garland typically takes about one to three hours, depending on your skills and the complexity of your design. If you're well-prepared and have all your materials ready, you might finish on the quicker side. However, if you're trying out intricate patterns or working with various textures, it could take longer. Regardless, the process can be enjoyable, allowing you to express your creativity while enhancing your festive decor.
Can I Use Recycled Materials for This Project?
You can definitely use recycled materials for this project! In fact, around 75% of paper products can be recycled, making them an excellent choice for crafting. Whether it's old magazines, cardboard, or fabric scraps, these materials not only reduce waste but also add character to your creation. Embracing recycled items can inspire creativity while promoting sustainability, allowing you to make something beautiful without harming the environment. So, gather those materials and get crafting!
What Is the Best Way to Store the Garland After Christmas?
To store your garland after Christmas, carefully wrap it around a sturdy cardboard tube or roll it loosely to avoid damage. If it's made from fabric or paper, consider placing it in a breathable storage bag to prevent moisture buildup. Label the storage container, so you know where it is next year. Avoid stacking heavy items on top, as this can crush and distort its shape, diminishing its beauty for future holidays.
Is This Project Suitable for Children?
This project's as suitable for children as a favorite storybook. You'll find that it offers them a chance to express creativity while developing fine motor skills. With supervision, they can safely handle scissors and glue, making it an engaging activity. Consider breaking the project into manageable steps, so they don't feel overwhelmed. Plus, it fosters teamwork if done in a group, creating cherished memories along the way.
How Do I Clean the Garland if It Gets Dirty?
To clean your garland if it gets dirty, start by gently shaking it outdoors to remove loose dust. For stains, use a damp cloth with mild soap, carefully blotting the affected areas. Avoid soaking the fabric, as this could lead to damage. If it's machine washable, place it in a mesh laundry bag and wash on a gentle cycle. Always air dry to maintain its shape and integrity, ensuring it stays beautiful for future use.