Making your own Christmas cards is a fun way to add a personal touch to your holiday greetings. Start by gathering materials like high-quality cardstock, scissors, and decorative items such as stickers or washi tape. Next, choose a design that reflects your style, whether it's traditional or whimsical. Don't forget to personalize your message; referencing shared memories or adding kind wishes makes your cards special. You can also create unique touches with hand-drawn illustrations or textured paper. Finally, assemble your cards, ensuring you're organized and include thoughtful details on the envelopes. You'll find many more creative ideas to enhance your card-making experience.
Gather Your Materials

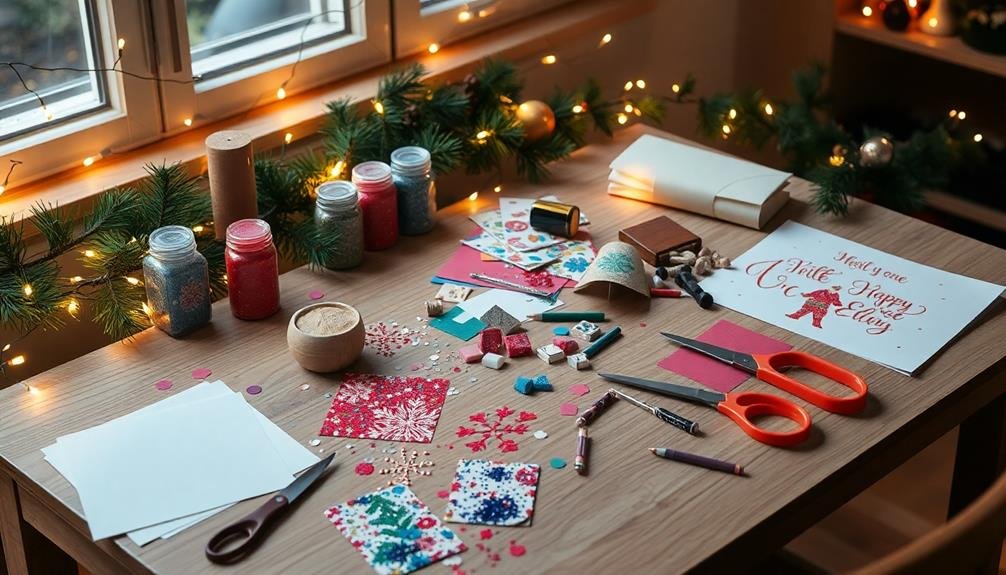
To create beautiful DIY Christmas cards, you'll need to gather a few essential materials. Start with high-quality cardstock or blank cards, which provide a sturdy base for your designs. You'll also want a good pair of scissors, a craft knife for precision cutting, and a reliable adhesive, like glue sticks or double-sided tape, to attach your embellishments securely.
Next, consider adding decorative items such as washi tape, stickers, or stamps. These elements can bring your cards to life, allowing for personalization that reflects your style. Don't forget colored markers, pencils, or watercolors for adding your own artistic flair. If you're feeling adventurous, think about incorporating fabric or ribbon to give your cards a unique texture.
Additionally, having a ruler and a pencil on hand will help you measure and sketch out your designs before you commit. If you're planning to include a printed message or photo, make sure to have a printer and quality paper ready. By gathering these materials, you'll set yourself up for a fun and creative card-making experience that can spread holiday cheer to your friends and family.
Choose a Design

Choosing a design for your DIY Christmas cards can be one of the most enjoyable parts of the process, as it allows you to express your creativity and set the tone for your holiday greetings. Start by contemplating the overall theme you want to convey—traditional, modern, whimsical, or elegant. Think about the colors that resonate with you; classic reds and greens evoke nostalgia, while blues and silvers can create a winter wonderland feel.
Next, sketch out a few ideas. You might want to incorporate festive elements like Christmas trees, snowflakes, or reindeer. If you're artistically inclined, hand-drawn illustrations can add a personal touch that store-bought cards often lack. Alternatively, you could use digital design tools to create a polished look, mixing graphics and text for a contemporary flair.
Don't forget to contemplate the size and shape of your cards, as this can impact your design. A folded card provides more space for creativity, while a postcard style can feel modern and straightforward. Ultimately, choose a design that reflects your personality and the warmth of the season, ensuring your card is a delightful surprise for everyone on your list.
Personalize Your Message

Adding a personal touch to your message can make your DIY Christmas cards truly special. When you take the time to craft a thoughtful message, it shows your loved ones just how much you care. Personalized messages not only enhance the card's sentimental value but also create a lasting memory.
Here are some ideas to help you personalize your message effectively:
- Include a Memory: Reflect on a shared experience from the past year that brings a smile.
- Use Their Name: Address the recipient directly to make your message feel more intimate.
- Share Your Wishes: Write about your hopes for their upcoming year, such as happiness or success.
- Add a Quote: Incorporate a meaningful quote that resonates with both you and the recipient.
- Express Gratitude: Thank them for their support or friendship, highlighting specific moments that meant a lot to you.
Add Creative Touches

Elevate your DIY Christmas cards by incorporating creative touches that reflect your personality and style. Start by experimenting with different materials. Think about using textured paper, fabric scraps, or even recycled items from around your home. These elements not only add depth but also make your cards stand out.
Next, consider adding hand-drawn illustrations or doodles. Whether you're sketching a simple snowman or intricate holiday patterns, your unique artistic flair will give each card a personal touch. You might even want to try watercolor techniques for a soft, festive look.
Stickers and stamps can also enhance your design. Choose seasonal images or fun phrases that resonate with the holiday spirit. Layering these elements can create a three-dimensional effect, making your card visually engaging.
Assemble and Send

Once you've infused your DIY Christmas cards with personal touches, it's time to assemble and send them out to your loved ones. Start by gathering all your materials, guaranteeing everything is organized. Lay out your cards, envelopes, and any additional items like stickers or stamps. It's essential to double-check that each card is complete before sealing them up.
To make the assembly process smoother, consider the following tips:
- Check for Address Accuracy: Verify you have the correct mailing addresses for everyone on your list.
- Personalize Each Envelope: Including a handwritten note on the envelope adds a special touch.
- Seal with Care: Use washi tape or stickers to secure your envelopes, making them feel extra festive.
- Add a Surprise: Consider slipping in a small photo or a holiday treat to delight the recipient.
- Set a Sending Date: Aim to mail your cards early in the season, so they arrive before the holiday rush.
Frequently Asked Questions
What Types of Paper Are Best for Christmas Cards?
When selecting paper for Christmas cards, consider cardstock for its sturdiness, which provides a professional feel. You might also choose textured paper to add a unique touch, enhancing the card's visual appeal. For a more eco-friendly option, recycled paper can be a great choice, reflecting your commitment to sustainability. Don't forget about glossy paper for vibrant photo cards, or matte finishes for a classic look, ensuring your creations stand out during the holiday season.
How Can I Incorporate Family Photos Into My Cards?
Have you ever thought about how special it feels to see loved ones' faces on holiday cards? To incorporate family photos, choose a layout that highlights the images, like a collage or a central photo surrounded by festive designs. You can print the pictures on quality cardstock or use stickers for a fun touch. Personalize the message beneath the photo, making each card a cherished keepsake that captures your family's holiday spirit beautifully.
What Tools Do I Need for Advanced Card-Making Techniques?
To master advanced card-making techniques, you'll need a variety of tools. Start with a good quality paper cutter for precise edges, and invest in a scoring board for clean folds. Use a die-cutting machine for intricate shapes, and consider embossing folders to add texture. Don't forget adhesive options like double-sided tape and glue dots for secure attachments. Finally, a selection of markers and stamps will help you personalize your designs beautifully.
Are There Eco-Friendly Options for Making Christmas Cards?
Creating eco-friendly Christmas cards is like nurturing a small tree; with care, it grows and thrives. You can use recycled paper, which reduces waste, or opt for plantable seed paper that blossoms into flowers. Natural dyes and biodegradable embellishments, like twine or dried leaves, further enhance sustainability. Plus, consider digital cards—efficient and paper-free. By choosing these options, you're not only crafting heartfelt messages but also contributing to a greener planet.
How Can I Store Leftover Materials for Future Projects?
To store leftover materials for future projects, you should organize them in clear bins or labeled envelopes, ensuring easy access. Keep similar items together, like paper scraps, ribbons, and embellishments. It's also helpful to designate a specific area in your workspace for these materials, reducing clutter. If you're using adhesives or paints, make sure they're sealed properly to prevent drying out. Regularly check your supplies to keep everything manageable and ready for your next creative endeavor.